Screen Printing Making Guide
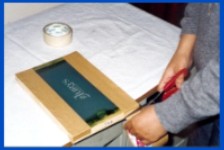
Step 1 Preparation
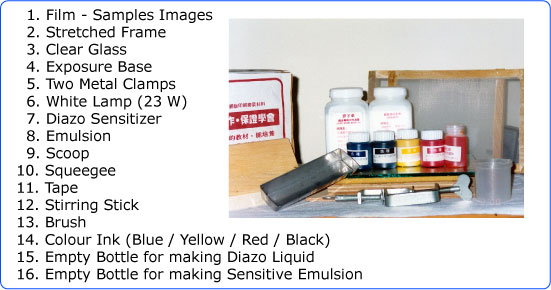
The steps for photo stencil aren't complicated, you just
need some simple equipment. In order to do the procedure smoothly, you
should prepare the following equipment first. This can help us to do the
work smoothly and to avoid mistakes. We have prepared a combo package
in which everything is included. For more information please click the
button below to find more details.
There are some instruction video below. You need Apple Quick Time to see the video.
Step 2 Cleaning the mesh (video)
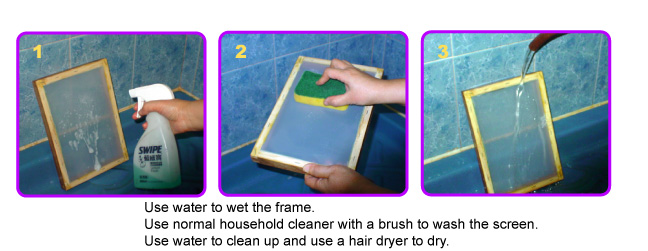
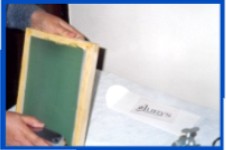
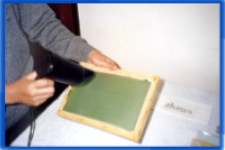
After the screen is stretched on the frame, there will
still be dust covering the screen even though you can't see it. You can
use household cleaners with a brush to clean the surface. Water can be
used and then a hair dryer to dry up the frame.
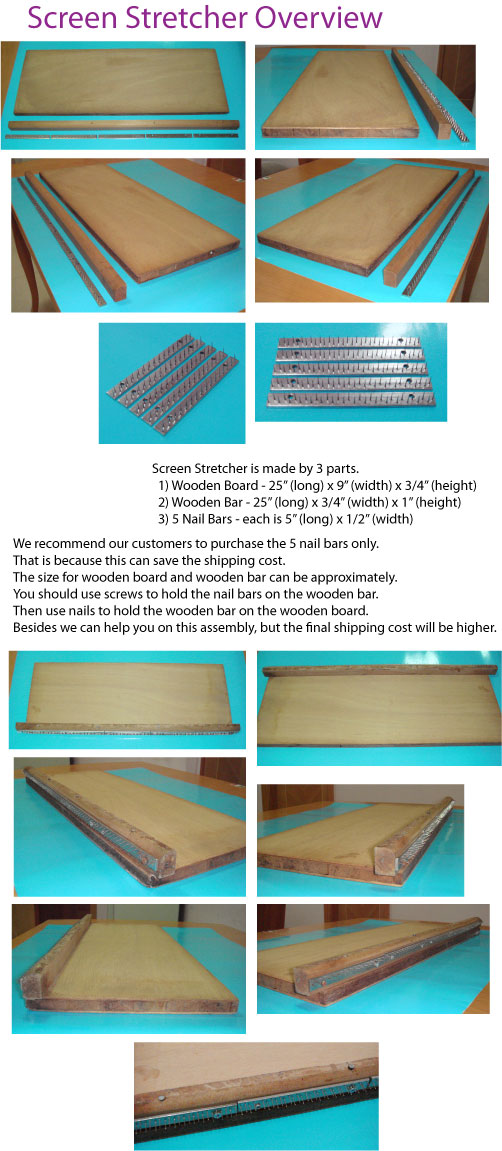
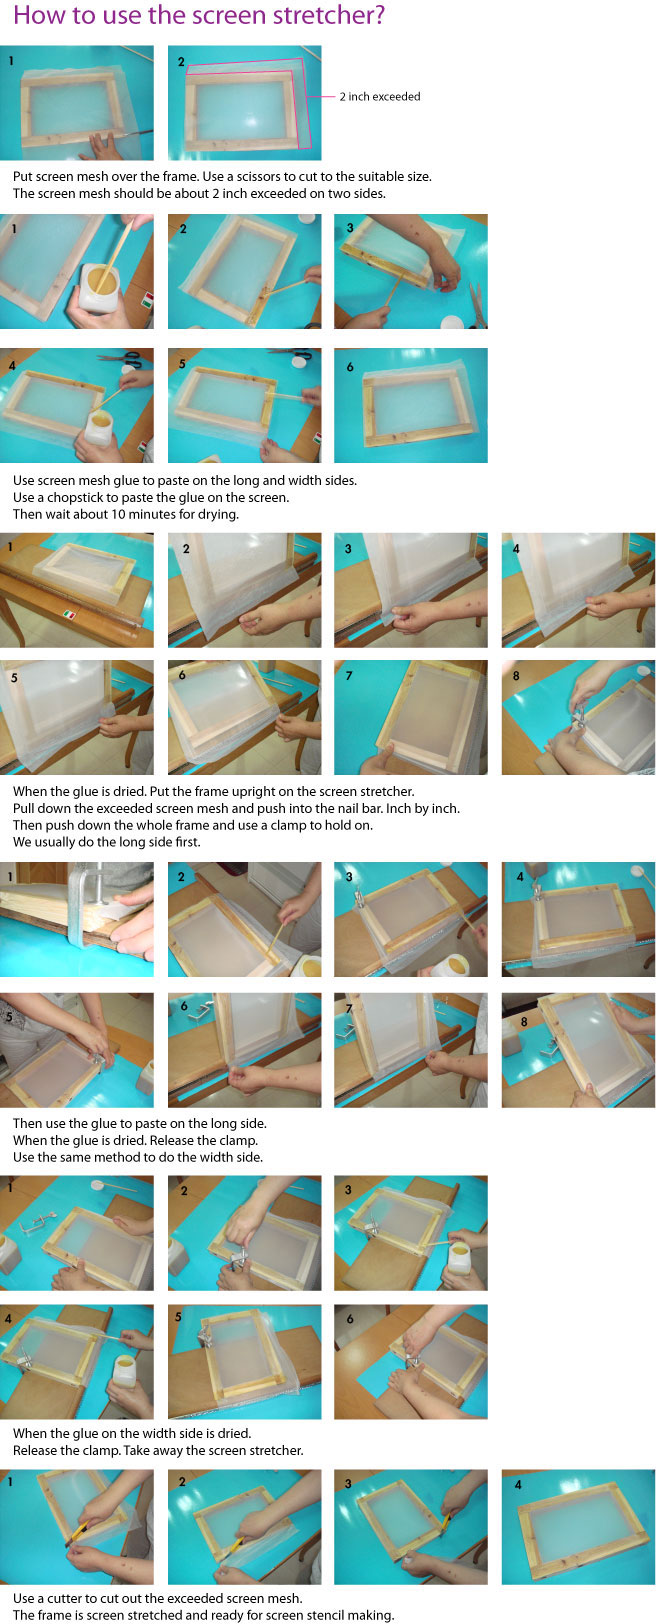
Question: How do I stretch the screen mesh on the frame?
You should have a screen stretcher to do this. Please click the following 3 links for more information.
A) Video instruction
B) Overview of the screen stretcher
C) How to stretch the screen mesh on the frame
Step 3 Mixing the sensitive emulsion (video)
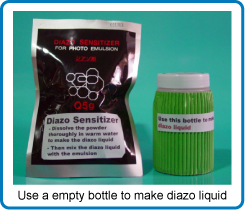 First
you should dissolve the diazo sensitizer powder thoroughly in warm
water to make the diazo liquid. You can use a stick to stir to dissolve
the powder in water. The liquid should be kept in a empty bottle. First
you should dissolve the diazo sensitizer powder thoroughly in warm
water to make the diazo liquid. You can use a stick to stir to dissolve
the powder in water. The liquid should be kept in a empty bottle.
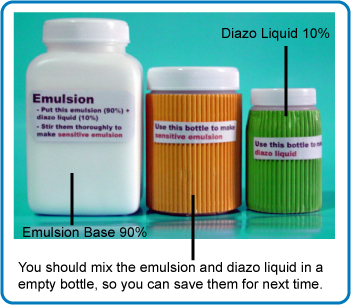
The sensitive emulsion is mixed from the diazo liquid and
emulsion base. This is because they have a longer shelf-life before they
are combined. The ratio is 9:1 (e.g. 90cc emulsion base and 10cc diazo
liquid). You can mix the sensitive emulsion in an empty bottle and use a
stick to keep stirring to blend the two materials together. Now the
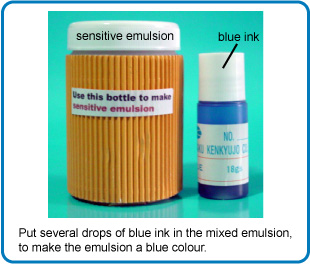
emulsion is a light yellow colour. You should pour 2 drops of blue ink
and keep stirring again until the emulsion becomes blue. This step
should be done in a low light, but total darkness is not necessary.
Step 4 Coating the screen (video)
After the sensitive emulsion is mixed, you should pour the
emulsion into the well of the scoop. Then one hand holds the scoop
whilst the other hand holds the frame. Place the scoop against the mesh
at the bottom of the screen and push slightly into it. Now draw up to
the top of the screen. Repeat this step one more time to make the
coating thicker. Then use the hair dryer to dry up the emulsion. Beware!
The dryer shouldn't be too close to the screen.
The extra emulsion can be poured into a dark sealed bottle for next time. The mixed emulsion can be kept for about two weeks.
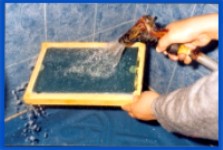
Step 5 Photo Stencil Exposure (video)
When the coating is dry, we can carry on to the next step.
The effect of the emulsion fades during the time lapsed. Place your
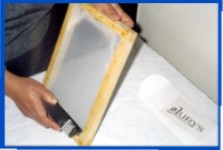
positive film on the screen, the image should be mirrored. Put the frame
on a wooden base with foam and put a flat piece of glass over the
frame. Then use two clamps to tie all the things up (see below images).
This creates a vacuum.
Place a lamp (23W) about 8 to 10 inch beyond the frame and
switch it on. The exposure time should be around 20 minutes. This
depends on whether your image is simple or complicated. You may also
need to move the lamp if the image is large. You should keep the lamp in
upper part for 10 minutes and move the lamp to lower part for another
10 minutes. When the time is up, take out the frame for washing.
Question: How do I make my own film?
You may use a laser-jet printer to print your images on
transparency or tracing paper. However, if you can find a local output
film company to output the film, the quality is better.
Step 6 Screen Washout (video)
 Put
the screen in the washout stand. Use a water spray to wet both sides of
the screen, you can increase the force of spray progressively if you
need. The emulsion will continue to wash out, and the open screen mesh
should be visible. Put
the screen in the washout stand. Use a water spray to wet both sides of
the screen, you can increase the force of spray progressively if you
need. The emulsion will continue to wash out, and the open screen mesh
should be visible.
If you find the image that you want is washed out, that
means the exposure time is too short. On the other hand, if the image is
difficult to wash out that is because the exposure time is too long.
For this problem, you should buy the strip powder (this is a
professional product for screen printing and is included in our combo
kit) to wash out the emulsion totally and repeat from step 4 again. The
next time you should adjust the time carefully.
If your screen is washed thoroughly, you can use the hair dryer to dry up the screen and jump to step 8.
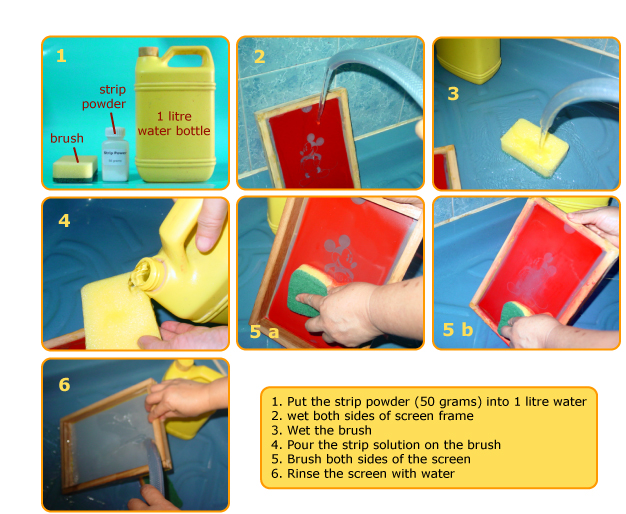
Step 7 Use the Strip Powder (video)
If you think the exposure result is not good, you can wash
out the emulsion and do the emulsion coating again (step 4). You should
first dissolve strip powder in water. The best ratio is to dissolve 50
grams of powder in 1 litre of water. You should find a empty bottle to
do this.
You should wet the frame and the brush first. Then pour the
strip powder solution on the brush (Do not pour the solution on the
screen directly, as this is a waste). Use the wet brush to brush both
sides of the screen. Then remove the emulsion by hosing it off with
water.
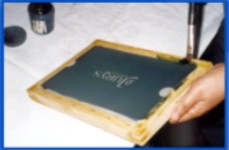
Step 8 The final touch up (video)
When the screen is dry, you should use a paint brush and
some emulsion to touch up the edge of the screen. This can prevent the
ink from leaking out during printing. Also you should use this method to
seal the pin holes when looking into the screen with the light behind
them.
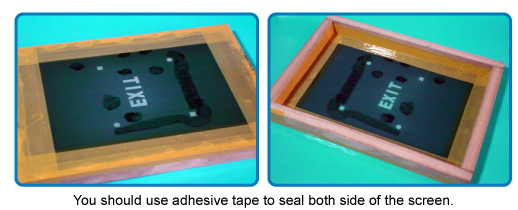
Then you should use the adhesive tape to seal the four
sides of the frame (both sides of the frame should be sealed). This can
provide extra protection. The screen printing making guide is complete.
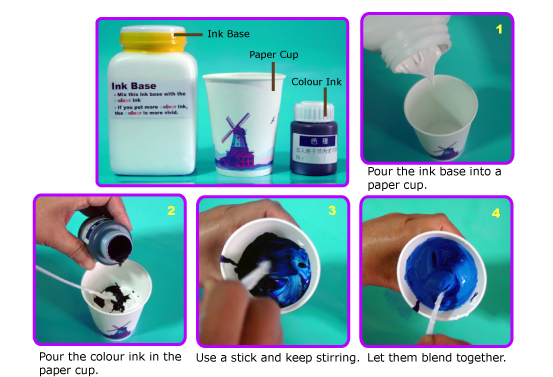
Step 9 Ink Mixing (video)
Before printing we have to prepare the ink. We usually mix
the colour ink with the ink base to form printing ink. Use an empty
paper cup to mix them together. This can save the ink (no wastage).
Pour the colour ink and the ink base into a paper cup, then
use a stick to mix them together. If you pour in more colour ink the
result will darker. However, if less colour ink in used, the outcome
will be lighter. When the ink is mixed, you can follow the next step for
printing.
Step 10 Printing and cleaning (video 1 / video 2)
First put the materials that will be printed under the
screen and hold it firmly. Then pour the ink on the screen and use a
squeegee to push the ink from one side to the other. Sometimes you have
to print twice, that depends on what material you are going to print.
After printing, if you have used water based ink, you can
use water to clean the frame directly. However, if the ink is oil based
you have to use the solvent for cleaning. The screen should be cleaned
immediately after use. This enables the frame to be used again or for
printing a different colour.
Water based-ink is usually printed on cotton and oil based ink is usually printed on plastic, nylon or paper.
|
|
|
|


0 comments:
Post a Comment